I’ll be frank — in Adobe InDesign, if you’re not using these 5 tools below, you’re doing it wrong. These are essential if you want to learn InDesign and use it like a pro. These InDesign tools allow you to work faster + smarter than any other design program out there. (Looking at you Canva and Photoshop.) Let’s cut the small talk, and get right to the juicy tools that you NEED to be utilizing if you want to really get your money’s worth with InDesign. (Stick around til the end to get your hands on my free InDesign training, too!)
1. Styles
Styles are a fundamental part of Adobe InDesign, but surprisingly a lot of users aren’t taking advantage of them. In a nutshell, styles are a pre-set of text formatting that can be applied to a word, a line of text, or an entire paragraph with one click. There are two types of typesetting styles in InDesign:
character styles — for specific characters, words, or lines of text within a paragraph
paragraph styles — for entire paragraphs of text, this type includes some extra paragraph-specific settings that character styles don’t (like hyphenation, paragraph shading, keep options, etc.)
It takes a bit of setup time upfront, but in the long run, styles can save you so much time in your design process. Apply styles with one click, and you’ll fly through your formatting.
2. Tables
Tables are another essential part of Adobe InDesign, but again, a lot of users aren’t familiar with them. Tables sound pretty straight-forward, and maybe even a little boring, but you may be surprised by how many ways you can use tables, and how you can streamline your design process with them even further. You can use the table tool in InDesign to create charts, references, worksheets, planners, organizers, calendars, catalogs, pricing guides, diagrams, or even mind maps. To take tables a step further, there’s another tool to help you work smarter + faster – table styles. Same concept as the character + paragraph styles, table styles let you create saved settings for table formatting (like the line colors, line widths, column and row sizes and spacing, and plenty of other places to customize your table design).
3. Liquid Layouts
This is my new favorite tool. Liquid layouts is an advanced tool of IND that lets you automatically change your page size, orientation, or aspect ratio, adjusting all your page content along with it. For example, if you have a full letter size file (8.5 x 11 in), and you want to create a half letter version of the file (8.5 x 5.5), this tool can change your page size + simultaneously adjust your content proportionately with one click. While it almost sounds too good to be true, in some ways it is. This tool isn’t fool proof, and it can certainly be finicky based on the type of content you have on your page. BUT, despite the extra finagling it does take to get your content back in place at the new size, it still helps you skip a bunch of steps, and saves a lot of time in the long run.
4. Parent Pages (formerly Master Pages)
Parent pages are the gem of InDesign! Think of them like mini page templates you can create and use throughout your document for pages that have repeated content on them, like a page number, a background, or a header / footer. They’re not part of your document’s final page count, they’re separate pages altogether (and you can create as many as you need!). You can apply these mini-templates to pages within your document with just a couple clicks. Elements of your parent page will appear locked on your regular document pages, but you can even unlock those elements if you need to. This is suuuuper handy for PDF documents that need page numbers or headers/footers. Parent pages also come into play when you’re creating a slideshow (no need to copy + paste the background over and over and over and… you get the point).
5. Loading Assets
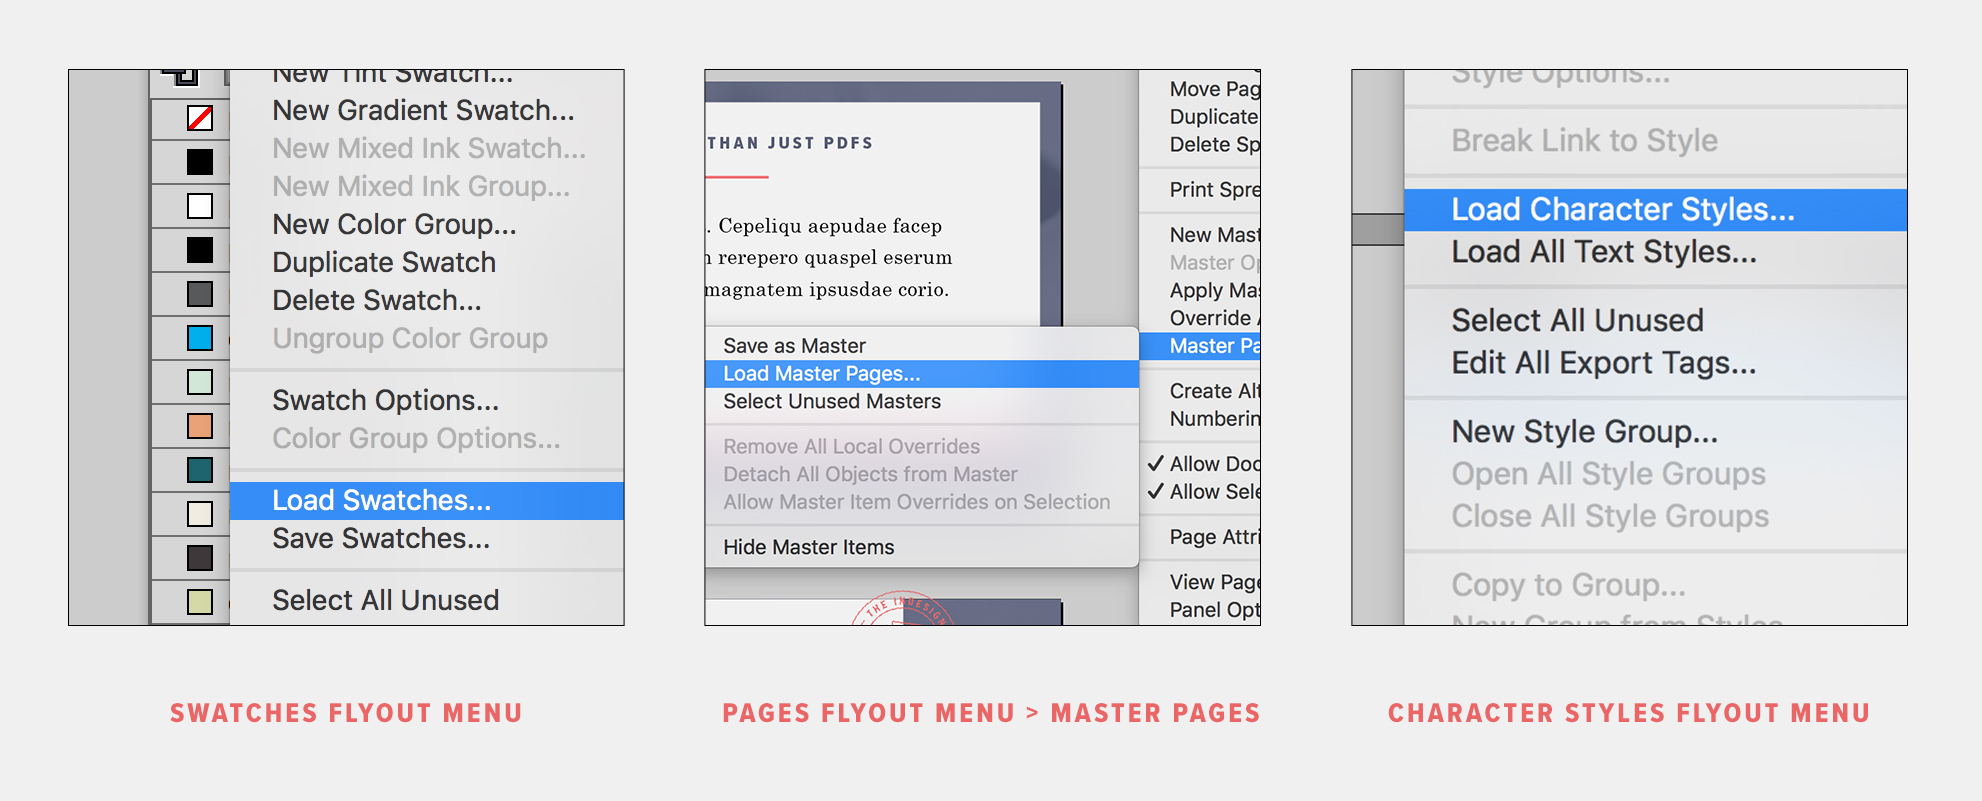
This underutilized tool is available in a few places, and allows you to quickly pull in assets from other InDesign files to use on your current file, without having to recreate them from scratch. You can load in color swatches, parent pages, and even all three kinds of styles – characters styles, paragraph styles, and table styles. This is perfect if you have several InDesign files that are all part of one project or brand, helping you streamline your design process even more. And these can also be helpful to use as a starting point in a new project – for example, loading in parent pages from a similar document, and customizing your design from there.
So there you have it, these 5 tools make InDesign uber powerful for SO many types of design projects – way beyond just PDFs or books, like many think InDesign is only good for. And if you've had your eye on learning Adobe InDesign, these tools are your 101. If you want to read up more on how InDesign can be a powerful tool for your business, keep reading some of these other popular posts:
Watch me work — this is your permission to hover.
Reading a blog post about design is one thing, but it’s a whole other learning experience to WATCH me design on-screen — so this is your permission to hover, my Internet friend.
Signup to watch my free on-demand workshop: How to Design a Printable Day Planner + Promo Graphic in Just 20 Minutes!
Get a behind-the-scenes look at my design process using Adobe InDesign, and learn some new tricks to help you work smarter + faster in your own business with the help of this powerful (and not so scary) program.


